Learn how to create a menu in WordPress and add it in the header navigation (or any other location). WordPress allows you to easily create your own menus and add them to the desired locations, including supported navigation menu locations and sidebar widget areas using the custom menu widget.
Website navigation menu is an essential feature for all websites and blogs. In this quick WordPress tutorial, you will learn how to create and add navigation menus in your WP blog or website.
How to Create Custom Menu in WordPress?
Log in to your WordPress website. and go to Dashboard > Appearance > Menus.
Before we actually start adding the menu, let’s activate the advanced features. Click on the Screen Options toggle button on the top right of the Menu Settings page, and select all the options. Click again on the Screen Options button to hide the settings panel.
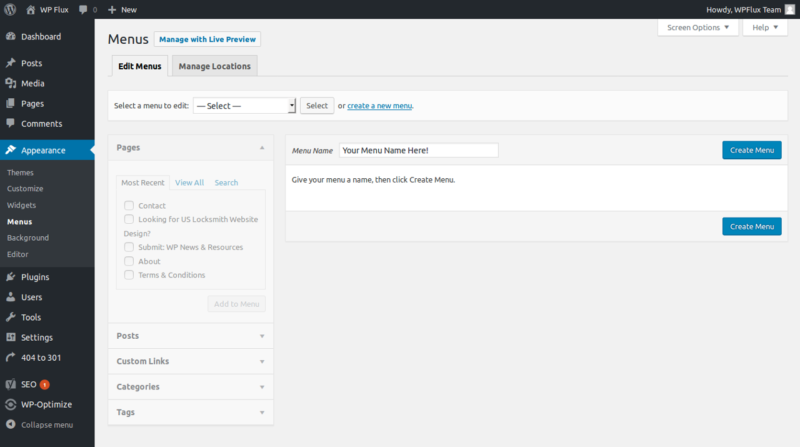
In the Edit Menus tab (selected by default), click on the ”Create a New Menu” link. If there’s no existing menu, you will already be on the Create Menu page. Add a suitable name to identify the menu, and click on the Create Menu button.

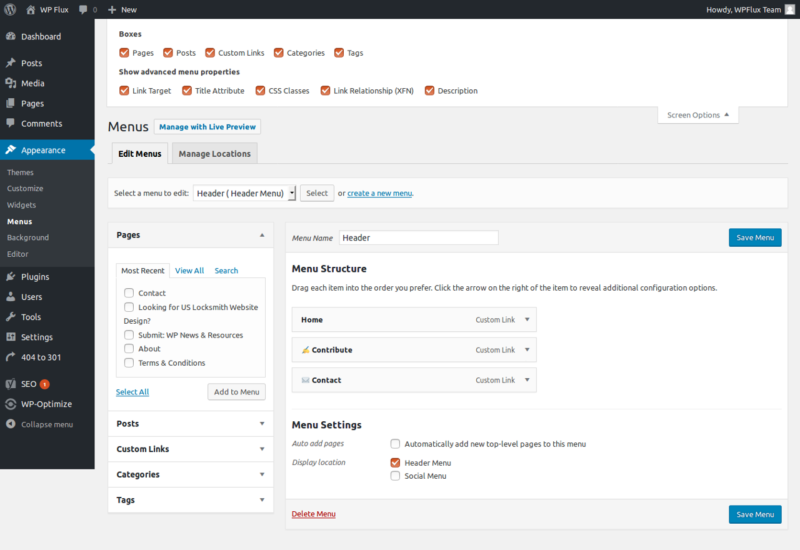
Select the pages that you want to add to the menu using the displayed options, and click on the Add to Menu button. Clicking on the arrow on the right of the item will show additional configuration options, such as adding title, description, link relation, rel attributes, opening link in a new tab and CSS styling via custom class.
Similarly, you can add links to posts, categories, tags, and custom links (to your own website page or any website).
Hover on the menu items, and drag-and-drop the items to organize the display order of the menus.
If you want to add sub-menus (or menus shown below one main menu) to any menu item, simply drag and drop the child menu item below the parent while keeping it slightly towards the right. Use this option to create any desired menu structure of main menus and child or sub-menus.
You can select the display location supported in your WP theme to show the menu there. You can easily set/change the menu display location later as well.
Once your menu structure is complete, click on the Save Menu button.
Go to your website front-end and see the new menu in action!
How to Set the Display Location of Custom Menu in WordPress?
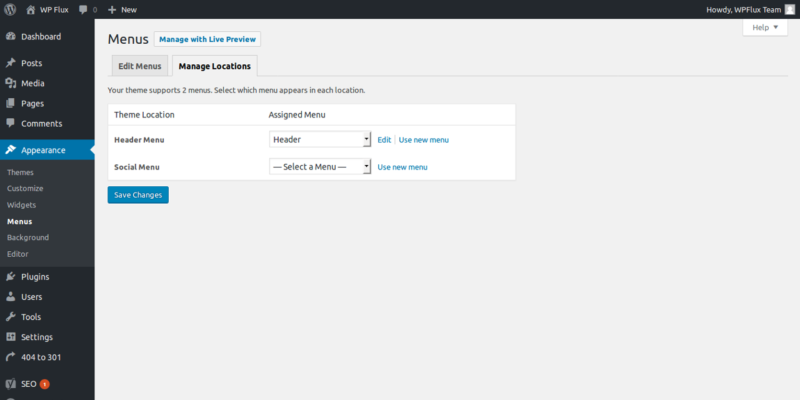
To set the location of an existing menu in WordPress, you can log in to your WordPress website and head over to Dashboard > Appearance > Menus. Now, click on the Manage Locations tab on the page. Select the desired menus for the locations supported by your theme. Each theme has different menu support; some might support one menu location while others offer more menu locations. Now, click on the Save Changes button. Done!
How to Add Page/Custom Link in Menu: WordPress?
To add a custom link address, such as a link to another website, in any menu in WordPress, you can log in to your WordPress website and head over to Dashboard > Appearance > Menus. Now, select the desired menu from the select option to edit the desired menu.
To add a page from your website to the menu, click on the Pages section on the left and select the desired page. If the desired page is not shown by default, click the show all option. Add the page link to the menu and click on the Save Changes button. Done!
To add a custom URL link from any website to the menu, click on the Custom Links section on the left. Now, enter the title for the menu item and add the URL/web address of the location. Add the custom link to the menu and click on the Save Changes button. Done!