Do you want to add Google Analytics to your WordPress website? In this guide, we will learn how to install Google Analytics code in your WordPress website or blog to monitor website visitors.
Understanding your website’s performance is crucial for making informed decisions, tracking user behavior, and optimizing your content. Google Analytics is a powerful tool that provides valuable insights into your website’s traffic and user interactions.
Install Google Analytics in WordPress Site
Step 1: Sign Up for Google Analytics
If you haven’t already, the first step is to create a Google Analytics account.
- Go to the Google Analytics website.
- Sign in with your Google account or create a new Google account for your website.
- Click on “Start for free” to set up a new Google Analytics property.
Step 2: Create a New Property
Once you’re logged in to your Google Analytics account, you’ll need to create a new property for your WordPress site.
- Click on the “Admin” tab located in the lower-left corner.
- In the “Property” column, click on “Create Property.”
- Choose “Web” as your property type.
- Enter a name for your property (e.g., “My WordPress Site”).
- Enter your website’s URL.
- Select your industry category and time zone.
- Click on “Create.”
Step 3: Get Your Google Analytics Tracking Code
After creating your property, Google Analytics will provide you with a unique tracking code. This code is what you’ll need to add to your WordPress site to start collecting data. Here’s how to find it:
- In the “Property” column, click on “Tracking Info” and then “Tracking Code.”
- You will find a JavaScript tracking code. Copy it to your clipboard.
Step 4: Add the Tracking Code to Your WordPress Site
Now, let’s add the Google Analytics tracking code to your WordPress site. There are a few methods to do this, but we’ll cover the two most common ones: 1) manually adding the code; 2) using a plug-in to add code to your WordPress site.
Method 1: Using a Plugin (Recommended)
The easiest way to add the tracking code is by using a WordPress plugin.
- Log in to your WordPress dashboard.
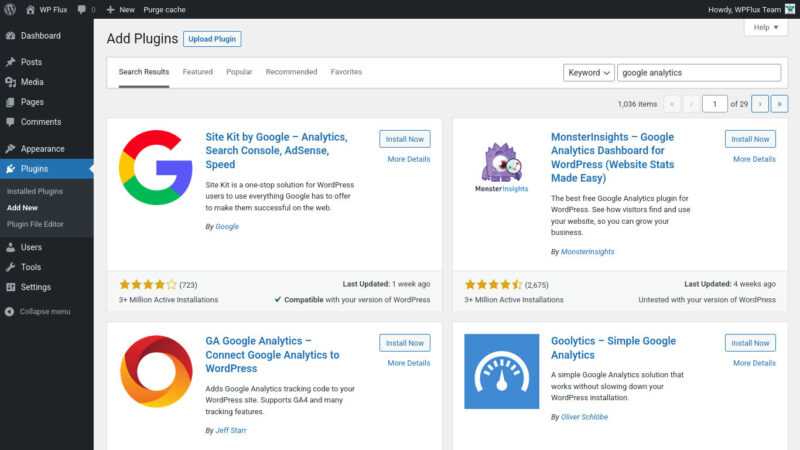
- Go to “Plugins” > “Add New.”
- Search for a plugin called “GA Google Analytics” or “AdRedux” or “Site Kit by Google.”
- Install and activate the desired plugin.
- Open the plugin’s settings page (located under the the Tools menu, or as an independent menu in the WP dashboard) and paste the tracking code into the designated field.
- If you choose Site Kit by Google, you will have to link your Google account via the plugin set-up wizard. This plugin also provides access other Google products and features.
- Save your changes.
The plugin will now automatically add the tracking code to your website’s pages.
Method 2: Manually Adding the Tracking Code
If you prefer to do it manually, follow these steps:
- Log in to your WordPress dashboard.
- Navigate to “Appearance” > “Theme Editor.”
- In the theme editor, locate the “header.php” file on the right-hand side.
- Paste the Google Analytics tracking code just before the closing
</head>tag. - Save the changes.
Step 5: Verify Your Tracking Code
It may take a few hours (up to 24-48 hours) for Google Analytics to start collecting data from your website. To verify that the Google Analytics tag has been installed properly and that it’s working correctly, follow these steps:
- Go back to your Google Analytics account.
- In the “Property” column, click on “Tracking Info” and then “Tracking Code.”
- Look for the “Status” field, which should show “Receiving data.”
That’s all about installing Google Analytics visitor tracking code in your WordPress website or blog. You can now access valuable data and insights to improve your website’s performance and make data-driven decisions.