WordPress is a free content management system for websites and blogs. You can download WordPress and install it on your own web hosting.
With self-hosted WordPress, you can customize the design and look of your website using themes. Though the primary purpose of a WordPress theme is to handle the design and appearance, themes often enhance functionality of the WordPress installation.
In this article, we will learn how to install, activate and customize WordPress themes. To learn how to install WordPress plugin, check this article.
How to Install WordPress Theme from Directory
In WordPress, you can automatically install themes from the WordPress Theme Directory or upload a theme in .zip format.
You can install, activate and customize themes through the WordPress admin dashboard of your website.
Here is the process for installing themes in your self-hosted WordPress blog or website using the WordPress Theme Directory.
- Log in to your WordPress website admin dashboard.
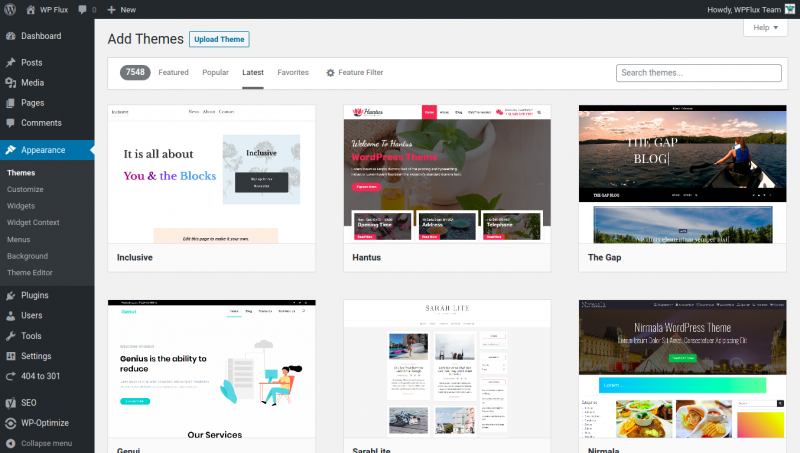
- Go to Appearance > Themes > Add New in the dashboard.
- Now, you can browse the WordPress Theme Directory directly from your website. Search using relevant keywords.
- Once you find the right WP theme, click on the Preview button to check the live preview of the basic features. To install the theme, click on the Install button.
- Once the theme is installed, click on the Live Preview button to open up the theme on your real site along with the customizer. Make the desired changes such as adding logo, change theme options and then make it live on your site.
How to Install WordPress Theme using .zip File
WordPress themes are packaged as .zip archive files. You can download and install WordPress themes using these .zip files.
Here is the process for installing WordPres themes using .zip archive.
- Log in to your WordPress website admin dashboard.
- Go to Appearance > Themes in the dashboard.
- Click on the Add New button link at the top.
- On the resulting page, click on the Upload Theme button at the top.
- Upload the WordPress theme .zip file that you have on your computer.
- Once the theme is successfully uploaded and installed, you will receive a success message. At the bottom. you can find the link to check the live preview of the theme on your site and activate it.
How to Change or Manage WordPress Theme
To manage installed themes in WordPress, visit the Appearance > Themes page in the admin dashboard. You can add, delete and change the active theme from here.
Here’s how you can change the theme of your WordPress site to another theme already installed on your site.
- Go to Appearance > Themes page in the admin dashboard to find all the themes installed on your site.
- Hover on the theme to reveal the options to check the theme information, live preview and activate themes.
- Click on the live preview to check how your real site will look using the theme. You can also customize the theme during the live preview.
- Switch and activate the theme that you like.
- Customize the active theme and manage theme options using the theme customizer. Simply go to Appearance > Customize to open up the customizer along with live preview of the changes made.
If you no longer need any theme, you can also delete it from this page. The theme deletion option is only available for inactive themes.
Also, make sure that your website has at least one of the default WordPress themes. In the latest WordPress versions, the default packaged themes are Twenty Nineteen and Twenty Twenty.
If there are no default themes in your WordPress site, the website will fail to load in case the last active theme becomes unavailable or deleted. Hence, retaining at least one of the default WP themes in your site.